
Five-step journey with Claude Code in .NET
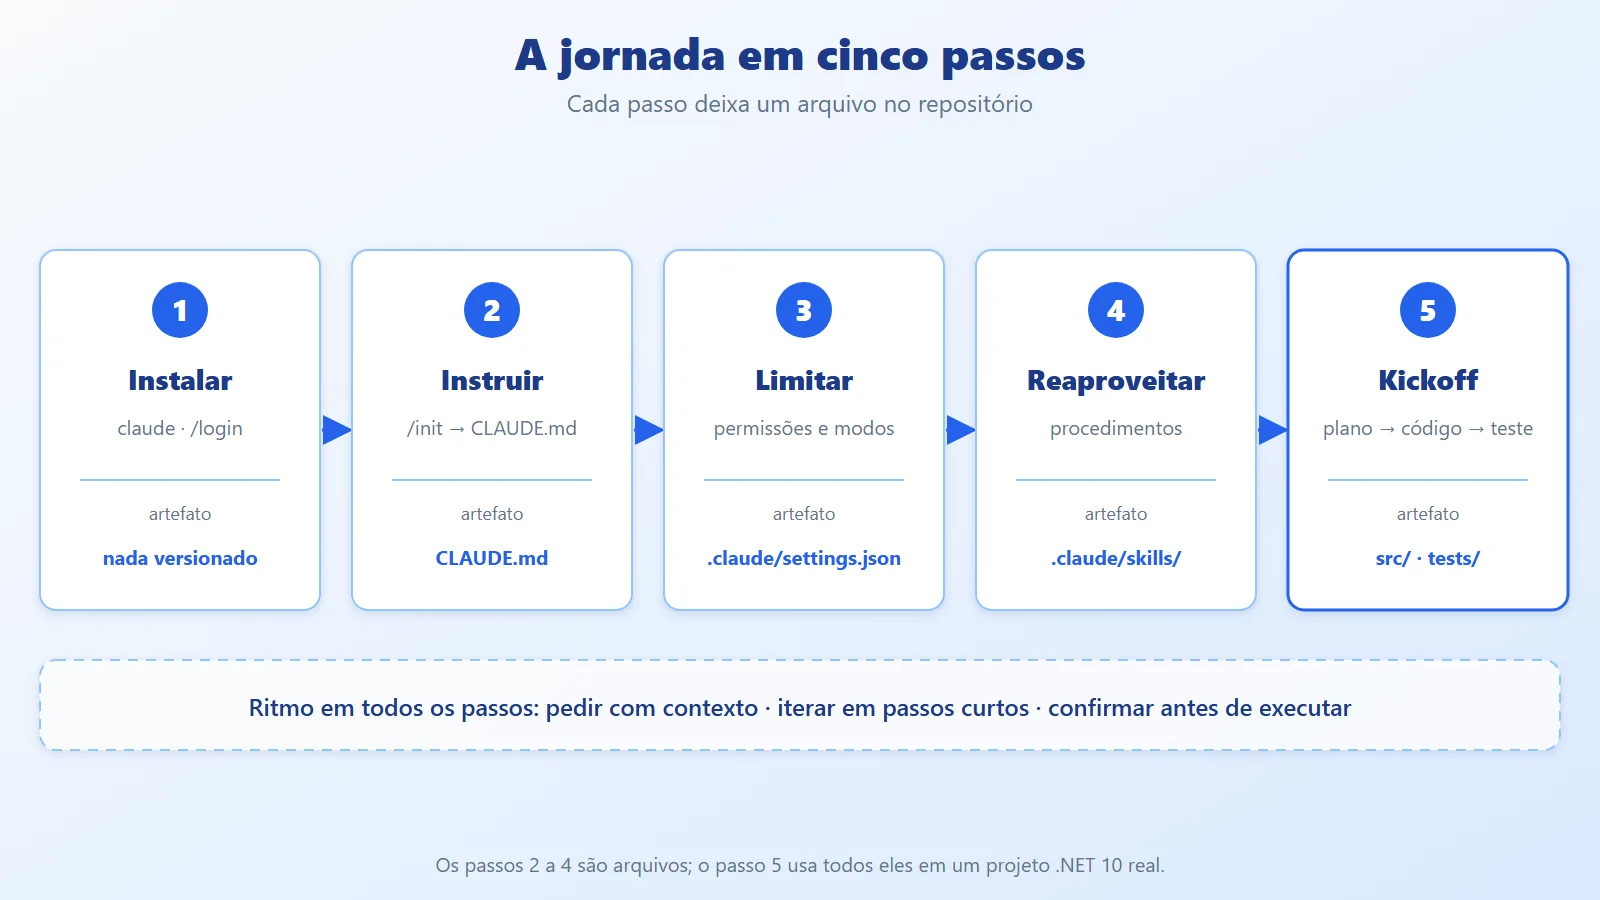
People trying a coding assistant for the first time tend to jump straight to the request ("create a tasks API") and get frustrated with the result: names that don't follow the conventions, packages nobody asked for, tests that don't run. The problem is rarely the model. It doesn't know the project, doesn't know what it can run on its own, and was used as autocomplete instead of a coworker. Setup and conversation rhythm shape the quality of the result as much as the request itself.
This article walks through the complete journey with Claude Code, Anthropic's command-line agent, in a .NET 10 project: install it, write the CLAUDE.md, set permissions, master the ask, iterate, and confirm rhythm, create skills, and finally use it all to kick off a Minimal API with tests. In this series, the MCP article showed how a model reaches your tools; here we look at how the developer works with the model day to day. All the code and configuration files are in a repository and were compiled and run.
Installing Claude Code and its configuration mechanisms
Claude Code is an agent that runs in your terminal (there are also extensions for VS Code and JetBrains, and a desktop app). It reads project files, edits code, runs commands such as dotnet build and dotnet test, and repeats that cycle until the request is done. Because it acts on your repository, three decisions matter from day one: what it needs to know, what it can do on its own, and when it should ask.
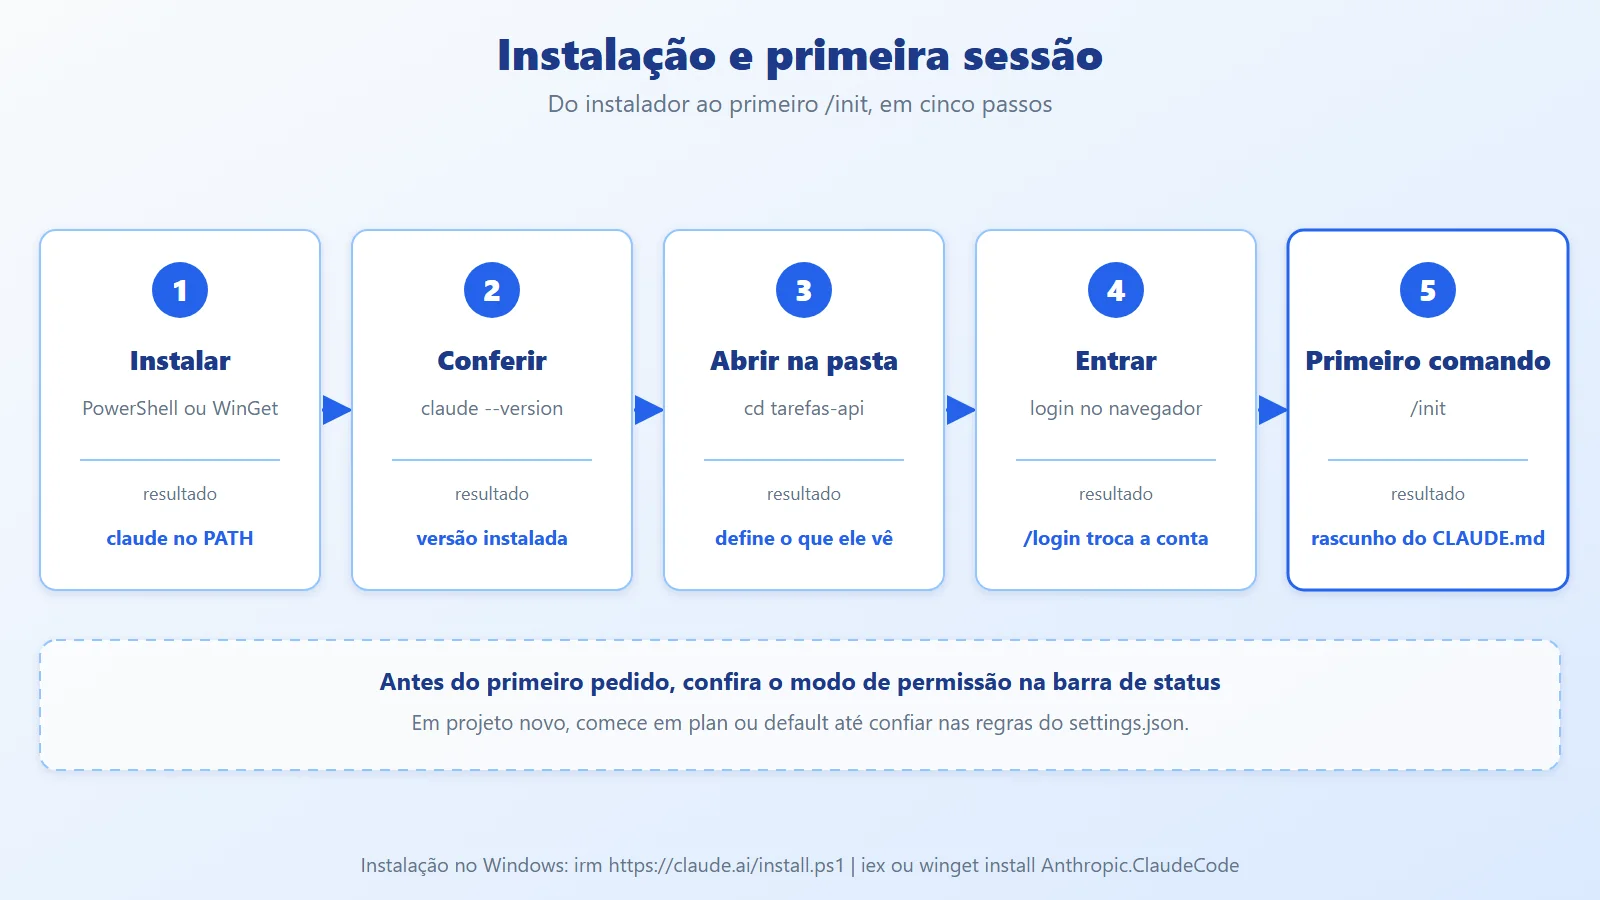
Installation and login. On Windows, from PowerShell (or WinGet):
irm https://claude.ai/install.ps1 | iex


winget install Anthropic.ClaudeCode


claude --version
The first time you run claude, the login opens in the browser; after that, /login switches accounts. Go into the project folder before starting, because that folder defines what Claude can see.
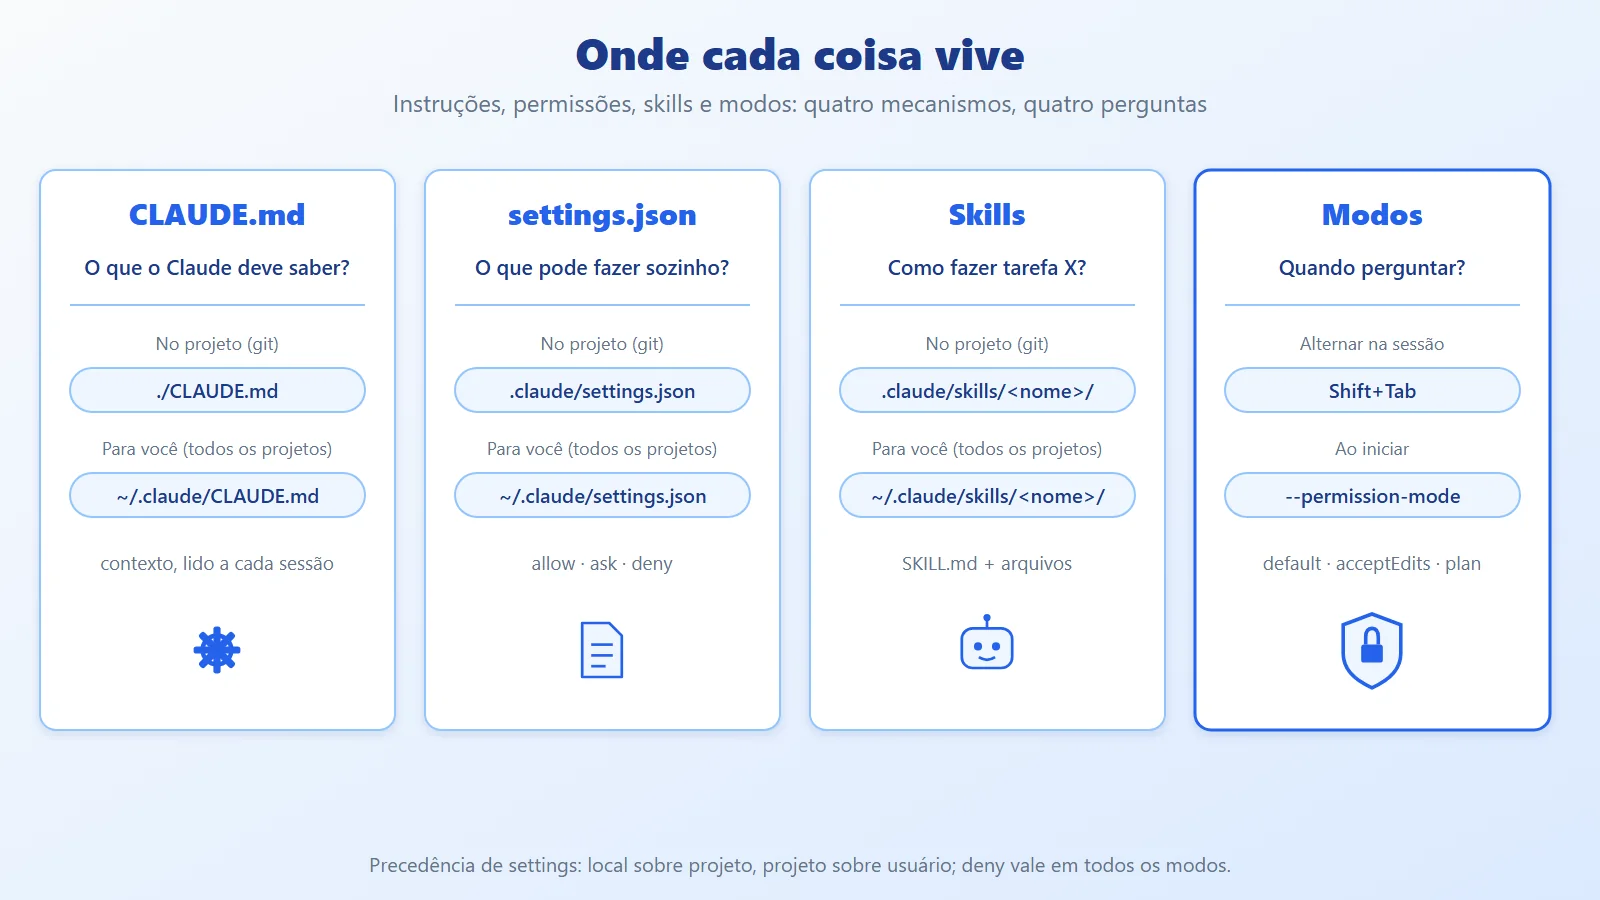
The four configuration mechanisms are:
- CLAUDE.md: text instructions that go into the context of every session. It lives in
./CLAUDE.md(or./.claude/CLAUDE.md) for the team, in~/.claude/CLAUDE.mdfor you across all projects, and in./CLAUDE.local.mdfor your personal project preferences (outside git). The/initcommand generates a first draft from the code. - settings.json: permission rules and other options. It exists at
~/.claude/settings.json(user),.claude/settings.json(project, versioned), and.claude/settings.local.json(personal, outside git). The most specific level wins. - Permission modes: define when Claude asks. The main ones are
default(asks before editing or running),acceptEdits(accepts file edits),plan(only reads and proposes a plan), andauto(a classifier reviews actions on your behalf).Shift+Tabcycles through them during the session. - Skills: reusable procedures, a folder with a
SKILL.md, which Claude loads when the task matches the description or when you call/name.
Watch the initial mode: starting with version 2.1.283,
automode is the initial one in interactive terminal sessions. Check the active mode in the status bar and, in a new project, start inplanordefaultuntil you trust the rules.

CLAUDE.md can import other files with @path, which avoids duplicating text:
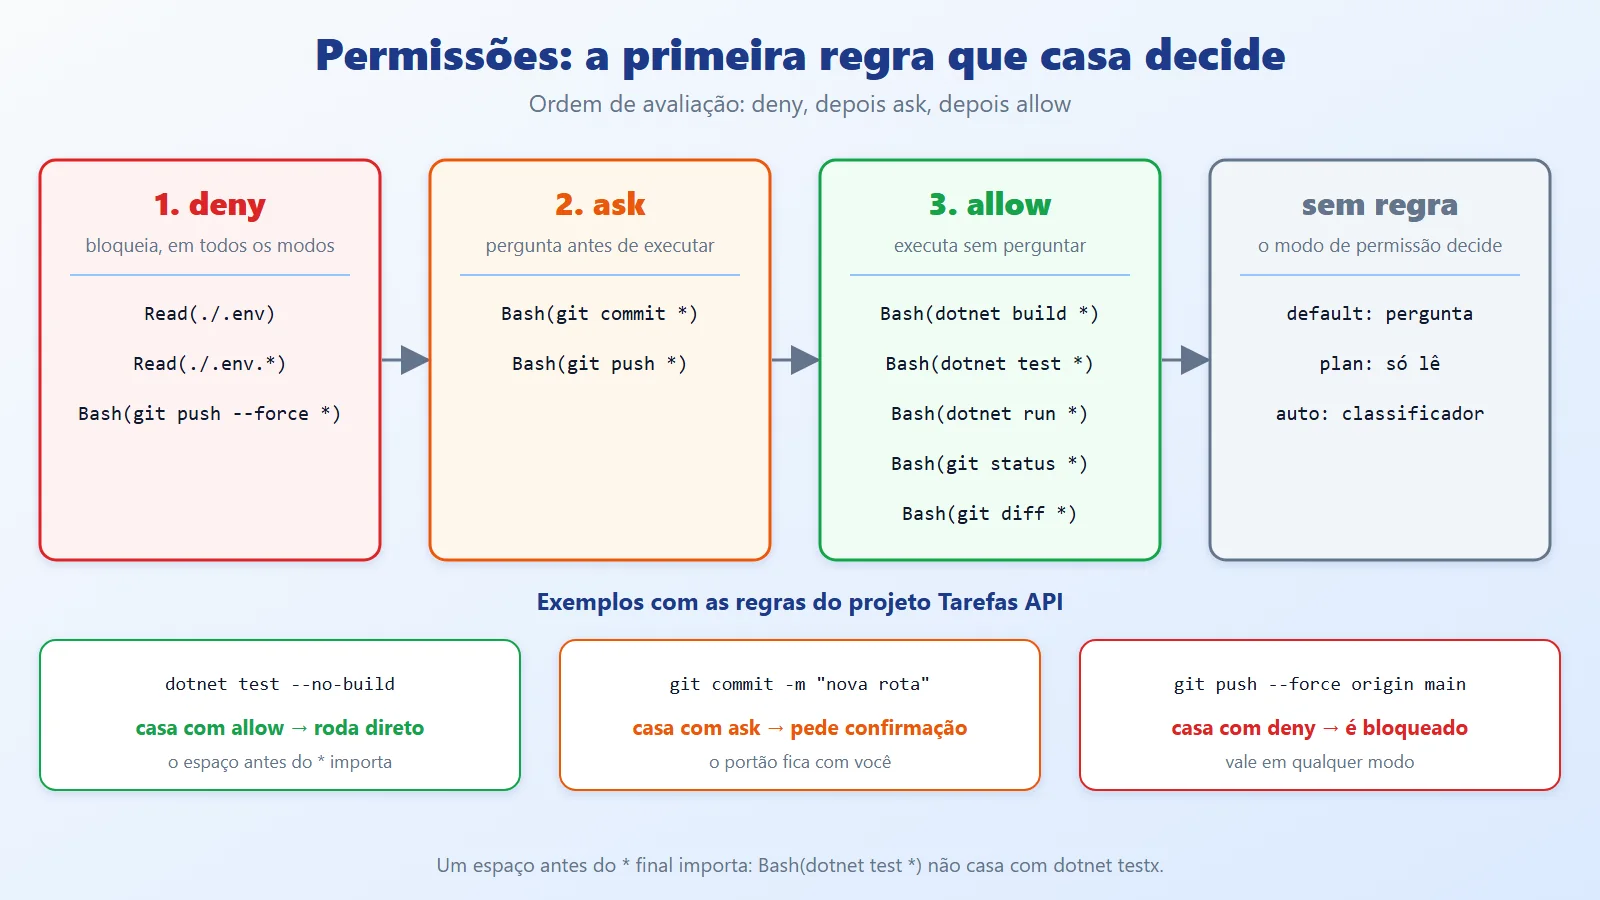
Overview and how to run: @README.mdPermission rules have the format Tool(pattern), evaluated in the order deny, ask, allow; the first one that matches decides. A space before the trailing * matters: Bash(dotnet test *) matches dotnet test and dotnet test --no-build, but not dotnet testx.
The ask, plan and iterate cycle in Claude Code, with skills
The approach is a cycle with confirmation gates. You ask, Claude plans and executes, you review, and only then do you record the result.

Ask. A good request has a goal, constraints, and a definition of done. Compare:
Before: create a tasks API


After:  Create a tasks Minimal API in .NET 10 with an in-memory


        list (create, get, list, complete). No database and no


        extra packages. Done when dotnet build and dotnet test


        pass.
Plan. For changes that touch several files, start in plan mode. Claude reads the code, proposes the plan, and edits nothing until you approve:
claude --permission-mode planIn the session, /plan and Shift+Tab enter this mode. When it's done, Claude presents the plan with three options: approve and continue in auto mode, approve and review each edit, or keep planning with your adjustments. Ctrl+G opens the plan in your editor so you can change it before approving.
Execute and review. Once the plan is approved, Claude edits and runs dotnet build and dotnet test. The allow rules in settings.json avoid interruptions on safe commands; the ask rules keep the gate on git commit and git push.
Iterate. Ask for one adjustment at a time, in writing, instead of redoing the whole request. Esc interrupts an action in progress, /rewind takes the conversation and code back to an earlier point, and /clear starts a fresh conversation, which is worth doing when you switch tasks. When the conversation gets long, /compact summarizes the history.
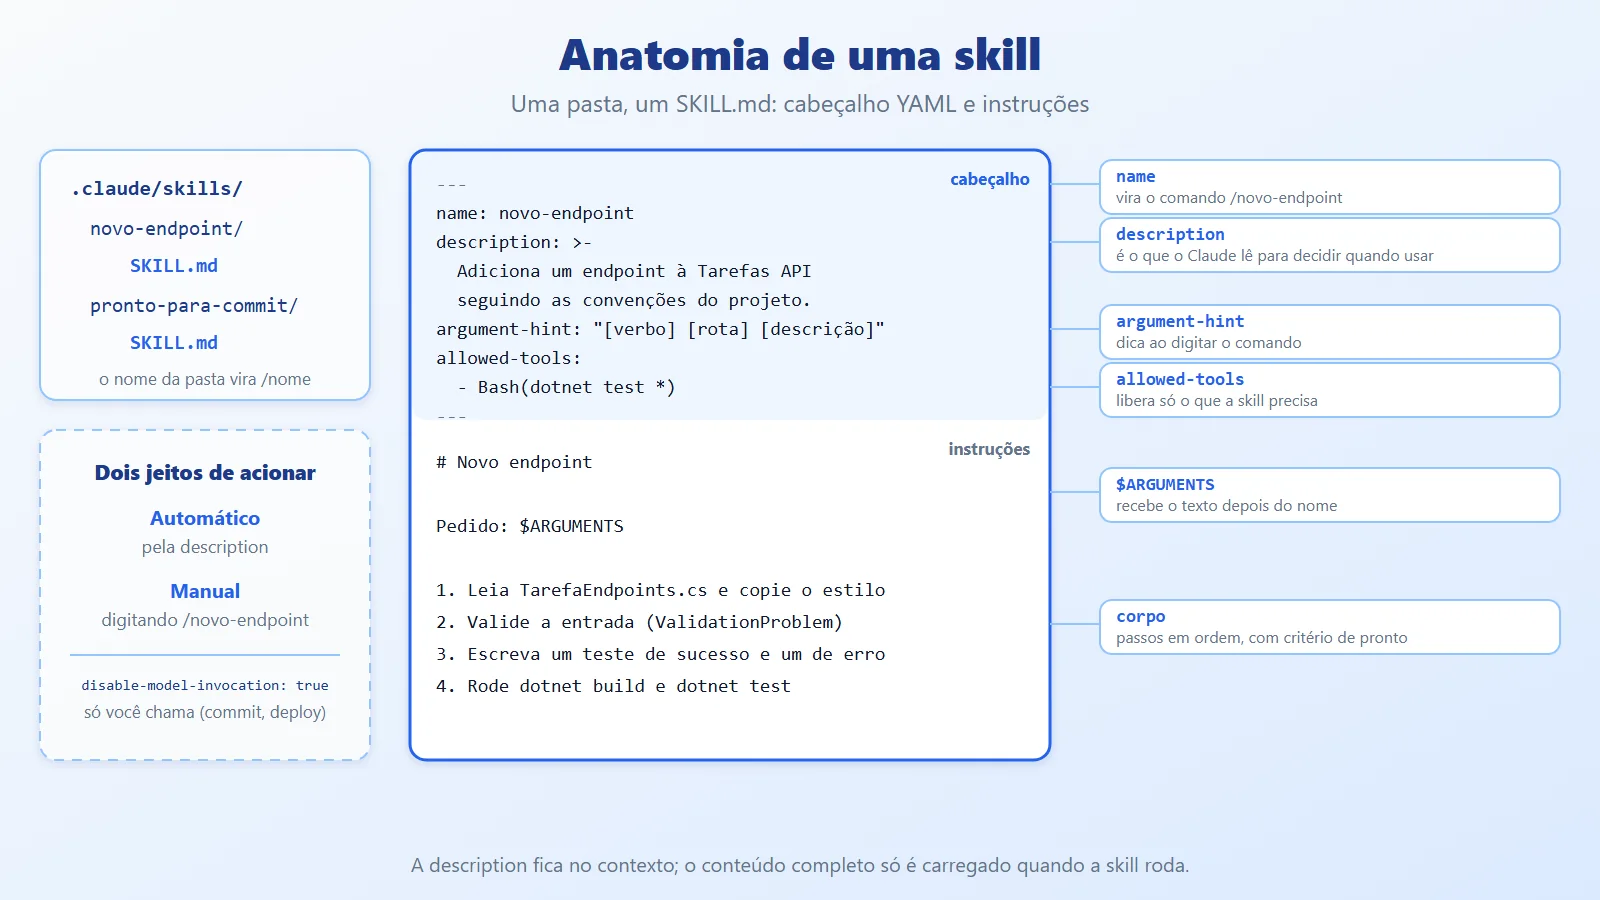
Reuse. When you repeat the same routine, turn it into a skill. The structure is one folder and one file:
.claude/skills/


  novo-endpoint/


    SKILL.md          instructions (required)


  pronto-para-commit/


    SKILL.md
The SKILL.md has a YAML header (name, description, and optionally argument-hint, allowed-tools, disable-model-invocation) followed by the instructions. The description is what Claude reads to decide when to use the skill.
Next step. With the CLAUDE.md, the settings.json, the permission modes, and the skills in place, all that's left is to put it all to use. In Part 2 this setup goes to work in the kickoff of a Minimal API in .NET 10 with tests, from the repository to the commit.
Part 1 references: Claude Code docs and repository
- Article code on GitHub: ceseidl/claude-code-dotnet
- Claude Code: Quickstart
- Claude Code: How Claude remembers your project (CLAUDE.md)
- Claude Code: Skills
- Claude Code: Settings and Permissions
- Claude Code: Permission modes
- Claude Code: Commands reference and MCP
- Series: MCP in .NET: Connecting AI Models to Tools and Data (ceseidl/mcp-dotnet)
Keep reading
- Claude Code with .NET, Part 2: continues the series and applies the setup to a real project with tests.
- Structure of a Claude Code Project: details what goes in each file and folder of the project set up here.
- MCP in .NET: Connecting AI Models to Tools and Data: shows how to give AI models access to tools and data through MCP.
Want to bring AI and Claude Code into your .NET team workflow? See the backend and .NET architecture service.